Rubik's Cube, and How to Solve it
Created | Updated Jun 10, 2013

Rubik's Cube is probably the most popular mechanical puzzle of the 20th Century: a small plastic cube about 6cm along each side with bright colours on each face. It is subdivided into smaller cubes so that it looks like it is constructed from 27 small cubes arranged in a 3 x 3 x 3 arrangement. Each 3 x 3 layer of cubes can be rotated independently of the others. The six outer faces of the Cube are coloured in bright colours, normally red, blue, green, yellow, orange and white, with one colour per face.
Turning the faces of the Cube scrambles the colours. Once you've turned a few faces, it is surprisingly difficult to restore the Cube to its initial 'pristine' state and after about five turns, it is impossible to get back to the start without an advanced general solving method.
History
Erno Rubik, a Hungarian designer, invented the Cube in 1974, when he was only 29. Rubik had studied sculpture and architecture and was now a teacher of interior design. He often made models as exercises for his students. The Cube was originally one of these design exercises - he wanted his students to try and visualise the mechanism inside. It was only after he built the first Cube and stuck some colours on the outside that he discovered the other puzzle: how do we get the thing back to the right order after mixing it up?
Rubik patented the Cube and went on to build and market it in Hungary under the name Magic Cube. In 1979, he approached a big game company, IdealToy Corporation and they agreed to make the Cube and market it in the West, under the name of Rubik's Cube. Rubik made plenty from the Cube, becoming the first millionaire in the Communist bloc. Despite this, the market was flooded with cheap 'pirate cubes' made in the Far East. These did not bear the Rubik name, but were about one fifth the price so most people bought these.
Cube mania hit the West in the early 1980s. Everybody had a Cube and doodled with it. Some people figured out how to solve it. Enthusiasts got together and traded sequences of moves. Some practised 'high speed solving'. Races were set up - adolescent boys boasted of being able to solve the Cube in under a minute! The world speed record is 7.08 seconds, by Erik Akkersdijk of The Netherlands.
Enthusiasts of the Cube are known by various names, such as cubers, cubists or even cubic rubes!
The Structure of the Cube
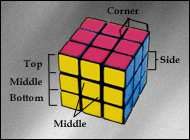
Before attempting to solve the Cube, it is important to understand some basic facts about it. While the Cube looks like 27 small cubes, known as 'cubies', there are in fact only 26. The one at the centre doesn't in fact exist, being replaced by an elaborate joint mechanism. The 26 cubies can be divided up as follows:
Six centre cubies - the cubie in the centre of each face turns but never moves, so these six cubies are fixed relative to each other. Centre cubies only show one face to the world. The colours of the faces on the final solved Cube are determined by the centre cubies.
Eight corner cubies - the cubies at the corners of the Cube each show three faces to the world. The position a corner cubie should be in is determined by the three colours. If, for example, it shows yellow, white and green, then it must be positioned on the corner where the yellow face, the white face and the green face meet. Not only that, but the cubie must be oriented correctly, as well as being in the right position. The corner cubie has three possible orientations, only one of which is right.
12 edge cubies - the cubies lying along the edges of the Cube, between the corner cubies, are the edge cubies. They each show two faces to the world. Their position is again determined by the two colours, and each cubie can be in two different orientations.
If a Cube were dismantled and put together at random, there are 8! x 38 different ways1 of arranging the corner cubies and 12! x 212 different ways of arranging the edges. Not all of these arrangements are reachable by turning the Cube faces, however. A detailed mathematical study of the Cube has shown that only one twelfth of the possible arrangements are in fact reachable, giving a figure of 8! x 38 x 11! x 212 = 43 quintillion different possible arrangements for the Cube, only one of which is the correct solution. No wonder we need a method for solving it.
Methods for Solving
Before learning someone else's method of solving the Cube, you should try and solve it yourself. Allow yourself about two weeks of hard work if you want to develop a general method.
Notation
While most Cubes have the six colours red, yellow, orange, green, blue and white, they're not always in the same positions relative to each other. For example some Cubes might have red opposite white while others might have red opposite blue. So we shouldn't use the colours when writing down Cube moves.
A standard among English-speaking cubists is to use the letters U, D, F, B, L and R to represent the six faces, standing for Up, Down, Front, Back, Left and Right.
The letter for the face on its own means a clockwise quarter turn of that face: U means turn the top face (Up) by one quarter turn clockwise. A tick (apostrophe) beside the letter means do the opposite: turn the face by one quarter turn anticlockwise. Finally a superscript 2 means turn the face a half turn (two quarter turns). Obviously this can be in either direction.
Solving the Top Layer

Pick one colour and call it the top. The centre of this face is the colour the whole face should be. Solving the top layer means getting the eight cubies around this centre into the right places. It's not enough just to get all the face showing the correct colour. Each cubie must match the colours of the other faces around it.
This is easier done than described. It is best to manoeuvre the edge cubies into place first. If they are in the top already but in the wrong place, you can turn them to the bottom, turn the bottom until they are directly under where they should, then swing them up into place.
Getting the corner cubies into place is slightly harder. There are two main ways: move stuff out of the way, move the cubie up, move the stuff back; or you can move the 'space' down to the bottom layer, turn the cubie into it, then put it back to the top layer.
When you've got the top layer done, you can take a well-earned breather. You've mastered thinking about the moving cubies.
Solving the Middle Layer
You now have the problem of positioning four edge pieces to finish the middle layer without disturbing the top layer. Consider the following two moves: B2 U2. This takes the line of three cubies that were at the bottom of the Cube at the back and moves them to the top at the front. It is now safe to turn the front face any way you want without disturbing any of the solved pieces from the top face. They've all been carefully moved out of harm's way. You can restore them to the top by doing the inverse of the two moves above: U2 B2. This can be used as the basis for a sequence of moves, for moving one of the required edges into the middle layer:
Position the cubie you want to move up at the bottom front edge. Do the following: B2 U2 F U2 B2. The cubie has now been moved to the front left edge.
Experiment. You'll find that this sequence is not good enough to get all four edges in place. See if you can find a sequence yourself which does this. If not, here's one:
B R2 U F U' R2 B'
The first three moves here clear the way by moving everything that's already correct away from the front face. The next move rotates the cubie into the desired position. The final three moves undo the first three moves, putting everything back where it should be.
Now take another long break. If you understood this, you've taken the next major step in understanding the Cube and your brain has been expanded a little bit more.
Solving the Bottom Layer
The final and by far the hardest stage is to solve the bottom layer. In fact, to make it easier to see what you are doing, turn over the Cube and work on what is now the top layer. But remember, any sequence of moves must leave the lower two layers undisturbed.
There are eight cubies on the top face, which must be manoeuvred into position - the centre cubie is already in the right place. These can be divided into four edges and four corners. It seems sensible to tackle one of these groups first and then the other. The method outlined here concentrates on edges, then sorts out the corners.
Getting the Edges in Place

The edges can be put into place without caring what happens to the corners. A very simple sequence of moves is the following:
L U F U' F' L'
This sequence swaps around three of the four edges on the top face, leaving the fourth one (the one on the back) as it is. It flips some of the edges while it does this, but this doesn't matter. Turn the top face so that one edge cubie is in the correct location and three are in the wrong place - don't worry if the cubies are turned the wrong way around for the moment. Now turn the Cube so that the 'correct' edge cubie is at the back of the top face. Then carry out this sequence, twice if necessary.
Turning the Edges to the Right Orientation
The sequence of moves outlined in the previous section can be combined with a variant of it to make a sequence, which flips the edge cubies without moving them:
L U F U' F' L' R' U' F' U F R
This sequence 'flips' the top front edge cubie and the top right edge cubie.
Getting the Corners in Place
Now we must move the corners into place, without disturbing the edges. A good sequence for doing this is as follows:
L' U R U' L U R' U'
It keeps the top front right corner cubie in place and moves the other three around. You may have to carry out this sequence a few times to get all the corners into the right places.
Turning the Corners to the Right Orientation
Turning the corners without moving them and without disturbing the edges is the last task and the hardest. To do this, we use a sequence of moves that turns one corner, without disturbing the top face, but that scrambles the rest of the cube. We can then turn the top face, and carry out the same sequence in reverse. This will unscramble the rest of the cube and put an opposite twist on another corner of the top face:
- Position a cubie to be turned at front right of top face.
- R' D R F D F'
- Turn top face until another cubie to be turned is at front right.
- F D' F' R' D' R
Repeat this sequence until all the corner cubies have been turned and - congratulations! - the cube is solved.
Some Other Sequences
While the method outlined above is enough to solve the Cube, it is handy to have a few extra sequences for special occasions.
Edge Flipper
This works on the same principle as the corner turner. It will flip two edges in the top face without disturbing the rest of the cube in any way.
- Position a cubie to be turned at front of the top face.
- L' R F' R' L D L' R F2 R' L
- Turn top face until another cubie to be turned is at the front.
- L' R F2 R' L D' L' R F R' L
Edge Mover
This sequence moves three edge cubies in the top face without affecting the rest of the cube.
L2 D R' L F2 L' R U2 D' L2
Three Corner Twister
This sequence twists three of the four corners of the top face without moving them, although it scrambles the edges. It is very useful if your method concentrates on the corners first and then the edges.
R' U2 R U R' U R U2
Tips for Speed
Oil the Cube or dust it with talcum powder.
Stop short or turn too far. Instead of turning the face through exactly 90°, you can improve the smoothness of the next turn by either stopping slightly short or by turning slightly too far. If the next turn will be in the same direction (clockwise/anticlockwise) as the turn you are doing, you should stop short. If the next turn will be in the opposite direction to the one you are doing, turn slightly beyond 90°.
Shut your eyes. When performing a long standard series of moves, it may help to shut your eyes and imagine the moves. That way, you won't be confused by the actual intermediate patterns that show up on the Cube.
Inside the Cube
Despite the millions of people who have owned a Cube over the years, very few know what's inside one. This entry won't attempt to describe the inner mechanism - without detailed drawings, the description wouldn't mean very much.
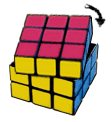
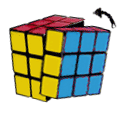
The best way to understand it is to see for yourself. The cube can be dismantled quite easily, particularly if it is a much-used one that has become loose at the joints. Turn the top face by one eight of a turn (45°). Then pull one of the corner cubies upwards, wiggling it a bit. The piece should pop out, leaving the rest of the Cube to come apart quite easily.
Putting the Cube back together requires some gentle pressure and a fair degree of wiggling! Be sure to reassemble the Cube in the solved state, with one colour on each face, otherwise there is an 11 in 12 chance that the Cube will be in a state which can never be solved.
While disassembling and reassembling is described here as an exercise in design, this approach has been adopted by some as a method of solving the Cube, and is one of the simplest.
The Simplest Solving Method of All
Frustration at the difficulty of solving the Cube has led many people to employ lateral thinking and to invent the simplest solving method of all. With care, the coloured stickers can be peeled off and put back on in the correct positions, so that the cube is solved! This process should only be done once, as the stickers will lose their stickiness.
Other Cube-like Puzzles
There have been a few variants on the Cube.
The Rubik's Revenge - a 4 x 4 x 4 cube, requiring completely new methods for solution.
The 5 x 5 x 5 - for masochists everywhere.
The 2 x 2 x 2 - this is a simplified version of the normal 3 x 3 x 3 and is the equivalent of getting just the corner cubies in place on a normal Cube.
The Octagon - this is still a 3 x 3 x 3 cube mechanism, but the corners have been cut off to give two octagonal faces and 8 rectangular ones. It is slightly simpler to solve than the standard Cube. It is best tackled by solving the corners first and then the edges.
The 3 x 3 x 3 sphere. This is just a normal cube mechanism, but shaped like a sphere. It is solved in exactly the same way as a standard cube.
The picture cube - this is a standard cube with pictures on each of the six faces instead of plain colours. This complicates things slightly, because standard solutions don't care which way the centre cubies are oriented (since you can't tell). Extra steps are needed to solve this one.

